Requirements
- PHP 4.1.0 or newer
- MySQL 3.23.32 or newer
- Optional: if you are using the “cookie” authentication method, having the mcrypt PHP extension on your web server accelerates not only the login phase but every other action that you do in phpMyAdmin.
- A web-browser
- Web Server
Note: Refer to this post for steps to setup the above required components.
Download phpMyAdmin
Download latest version of phpMyAdmin. For Windows web server, the zip package should downloaded.
Install phpMyAdmin
- Extract the distribution into a folder (phpmyadmin is fine) in your webserver’s document root (../apache group/apache2/htdocs). If you don’t have direct access to your document root, put the files in a directory on your local machine, and, after step 3, transfer the directory on your web server using, for example, ftp.
- Locate the folder, edit the config.inc.php file with any text editor.
- Search for $cfg[‘Servers’][$i][‘auth_type’], modify the value from ‘config’ to either ‘http’ or ‘cookie’, for security purpose. ‘http’ will prompt you for user id and password for each login, while ‘cookie’ will prompt you for user id and password for one time only until the cookie is deleted or expired.
Testing and Accessing phpMyAdmin
Launch your browser and access http://localhost/phpmyadmin/index.php (or http://[www.your-host.com]/[your-install-dir]/index.php by replacing [www.your-host.com] with your own domain, and [your-install-dir] with path of your phpMyAdmin.
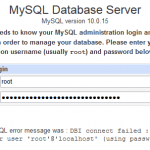
phpMyAdmin should display a welcome screen and your databases, or a login dialog if using HTTP or cookie authentication mode.


