With the popularity of iPhone, iPad, iPad mini and Mac OS X systems, and previously the iPod, many people has now purchased and owned media content on the iTunes Store. Apple’s iTunes Store has grown from an online music store in iPod era to one-stop online marketplace for digital entertainment, selling contents ranging from music, movies, TV shows, music videos, ringtones, books, audiobooks, and applications.
User can sync and use all content that he or she purchased from iTunes Store on Windows PC or Mac OS X machines. To do so, you will need to authorize the PC or Mac and link the computer to your Apple ID. The license of iTunes Store officially allows users to authorize and play the purchased content from iTunes Store on up to five computers at a time.
If you attempt to download or play a past purchased content such as music or video, or use Home Sharing, or use the Automatic Downloads setting on a computer which has not been authorized, you may get error messages such as “Your computer is not authorized. You must authorize this computer before you can download past purchases on it.”
How to Authorize Your Computer in iTunes
- Open iTunes.
- Click on the Store on the menu bar, then select Authorize This Computer.
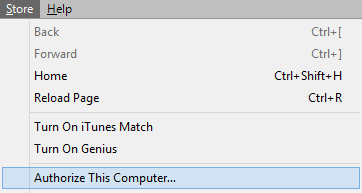
Note: The menu bar is hidden by default in Windows 7 and Windows 8. To display them, press Alt key. Or you can press Alt + S to directly open the Store mneu. To make menu bar displays permanently, select the Menu icon in the upper-left, and then select Show Menu Bar. Alternatively, you can press Ctrl + B.
- Enter your Apple ID and password, and then click Authorize.
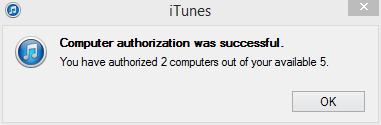
- After successful authorization, a dialog box will appear and indicate that how many devices you have authorized out of available 5.
You can deauthorize iTunes from a computer if you no longer want to playback iTunes purchased contents on the computer, such as in the case of selling or giving away the computer, or plan to reformat the operating system, or plan to upgrade the computer’s components such as memory and hard disk. It’s important to deauthorize a Windows or Mac OS X system before reinstalling or any significant hardware change as failure to do so may result in multiple authorization, which uses up more the required license from the maximum limit of 5.
How to Deauthorize Your Computer in iTunes
- Open iTunes.
- Click on the Store on the menu bar, then select Deauthorize This Computer.

- Enter your Apple ID and password, and then click Authorize.
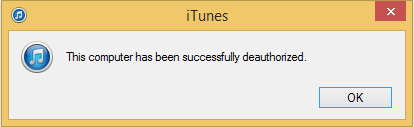
- iTunes will prompt a dialog box indicating the computer has been successfully deauthorized.
If you no longer have access to many computers which are previously authorized but not yet deauthorized, or can’t remember which systems you have authorized, it’s possible to deauthorize all your computers from the iTunes Store and your Apple ID.
How to Deauthorize All Your Computers
- Open iTunes.
- Click on iTunes Store.
- Click Sign In and enter your Apple ID and password, and click Sign In. Skip this step if you’ve already logged in.
- Click on your Apple ID and select Account.

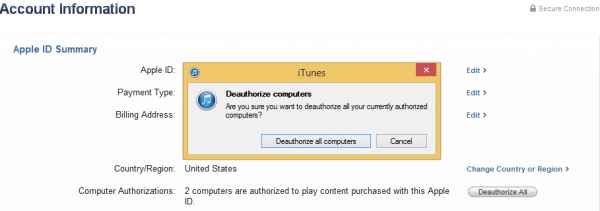
- Click Deauthorize All under Apple ID Summary section.
Note that the Deauthorize All button appears only if you have more than two authorized computers.
- Click Deauthorize all computers again to confirm.

 Tip and Trick
- How To Download HBO Shows On iPhone, iPad Through Apple TV App
- Windows 10 Insider Preview Build 19025 (20H1) for PC Official Available for Insiders in Fast Ring – Here’s What’s News, Fixes, and Enhancement Changelog
- Kaspersky Total Security 2020 Free Download With License Serial Key
- Steganos Privacy Suite 19 Free Download With Genuine License Key
- Zemana AntiMalware Premium Free Download For Limited Time