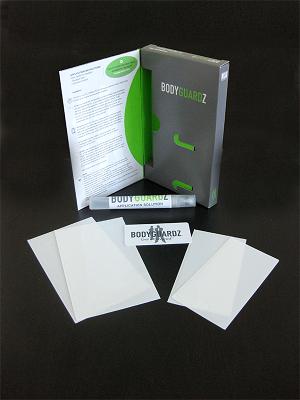
BodyGuardz skin film is well known for its high quality and durability to protect smartphones, GPS units, media players, laptops and other portable consumer electronics products. It is being designed using indestructible material and custom tailored to fit with full body and screen protection while maintaining a full operability and clarity on your mobile devices. We are delighted to receive a free Apple 3G iPhone protective skin sample from BodyGuardz and have recently applied it on the iPhone with an actual hands-on experience. Basically, the kit consists of two custom-fit skin protector, a squeegee card, an application liquid solution and complete instructions guide. However, there is no cleaning cloth being bundled with and so you may have to get yourself ready with an anti-dust cleaning and dry cloth to clean up the front and back of your iPhone surface before start applying the new film onto it. This is important process as most of us can’t get a ‘clean room’ environment to ensure no visible dust is trapped beneath the skin that affects the whole appearance on your iPhone.
There is no sequence on whether to apply the skin on front screen or back housing first but if you are first time doing this, it is advisable to apply the screen portion first as it is relatively much easier and it would be good to get a feel before doing a much challenging one later. More importantly, you will get a feel on how much spraying liquid is sufficient and will definitely help to build up your confidence on sealing the back cover later.
For the start, spray a minimum amount of liquid onto your hands and fingers which will be directly in touch with the film. Then, gently peel off the layer of the protective film and on the adhesive side, spray a minimum amount of liquid again to prevent from sticking. It may be hard to quantify what it means by minimum amount of liquid here but you will definitely able to get the feel after applying it on the front skin. Personally, I feel that spraying too much tends to make the surface too smooth and eventually too ‘sensitive’ when you are trying to align the skin properly on the surface. So, an amount that is good enough to prevent stickiness to your hand or phone surface will be adequate. This is crucial as the misalignment will affect the whole appearance of your iPhone. Although you may still able to ‘fine tune’ to try covering the misalignment at certain portion, but due to the nature of its elasticity and durability characteristics, it tends to resist the unnatural way of bending and you may ended up in the original misalignment situation.
If you have experience in applying normal screen protector on the iPhone screen before, it will definitely helpful and what you need to do is just align the speaker and home button carefully while making sure the film is centralized, nicely covering all four edges. Best still, the liquid enables you to adjust the film even though it was already applied on the screen to make it perfect solution as most of the screen protector available in the market doesn’t bundle with it. Once completed, use the squeegee card to flatten the surface and remove all the trapped liquid or bubbles on the surface. Don’t worry if there is still some tiny bubble as it will completely go away after leaving the iPhone for 24 hours.
Next, be ready for the toughest part as unlike front screen, the iPhone back housing is designed in curvature shape that adds some challenge when trying to apply into it. Do ensure that the surface is clean and free from dust (especially if yours is white color) including those on the chrome edge (as it is quite visible regardless your iPhone’s colors). Similarly, spray some minimum amount of liquid on both your hand and the adhesive skin. Gently peel it off and position it on your back side of your iPhone with the first alignment point focusing on the camera, power button, earpiece jack, vibration and volume buttons consecutively. At the same time, try to counter check the positioning by monitoring the coverage at the far end near to both the stereo speakers and charging contact. By now, you should understand why excessive liquid will not help as it can easily slip away from perfect alignment that you did as you need to simultaneously monitor all the edges and openings to fit it well. You can slowly align it until you get the best fit especially on the chrome edge since this is the most common place that tends to keep dust in the long run and affect the whole appearance of your sleek and stylish iPhone.
That is not all, the toughest part here is on the four corners where the bending angle is the most among all other sides. And since Bodyguardz skin is designed to be durable and so the skin itself is tough, it could be quite challenging to bend the angle as according to the curvature shape and hence require some patience to try few times before the liquid is completely dried off for it to stick properly. And the misalignment outcome is especially obvious in these areas where a slight unnatural bending will cause it to appear as a whitish bubble when they collided together at an uneven end. Bear in mind that the film is precisely cut to suit the iPhone body and once you align it properly, it will perfectly fit and so it is important to do it right with proper alignment at the first place.
BodyGuardz does provide a video clip showing how to apply BodyGuardz skin to iPhone 3G, and more can be found here.
In summary, the BodyGuardz skin is definitely designed for DIY (Do-It-Yourself) for end users and you just need some patience, and when combination with cleanliness and precise alignment, it will yield a desirable protective layer for your mobile device. Best thing is, the transparent skin doesn’t affect your original sleek outlook and more importantly, there is no impact on original touch screen sensitivity with no residue left from the adhesive or liquid solution. No specific additional tool except the squeegee card and the liquid solution and you just need to control the amount of liquid for it to stick and dry up properly. Although there are two sets and users can always peel the original one off for reapplying, but hopefully you can do it right at the first time and typically, an hour of time is sufficient for a successful work.
 Tip and Trick
- How To Download HBO Shows On iPhone, iPad Through Apple TV App
- Windows 10 Insider Preview Build 19025 (20H1) for PC Official Available for Insiders in Fast Ring – Here’s What’s News, Fixes, and Enhancement Changelog
- Kaspersky Total Security 2020 Free Download With License Serial Key
- Steganos Privacy Suite 19 Free Download With Genuine License Key
- Zemana AntiMalware Premium Free Download For Limited Time